Here goes:
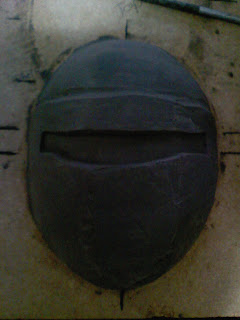
This is the outside of the mold we made of our subject's face. The clay in the nose is to plug up the nostrils. This is a pretty thick mold, as we did multiple layers. I figure it can be used at least a few more times to make bases for future castings.

This is the inside of the same mask. You can see how rough it is around the mouth and eyes. ugh. I need to practice this a lot more, I think. Thankfully it doesn't matter much for this build, but still. Not at all what I'd like.

Yeah. This is the mold. If you know the girl it looks a bit like her, but with really messy features. If I do this again, I'm going to use larger pieces of plaster bandage exclusively. They seem to work a lot better than smaller ones. I may do some smaller pieces across the nose but only after the first layer is on.

Here's the inside and outside together.

The plaster base is buried in this big pile of clay. What purpose is there to making a plaster base when you're just going to pile clay on it, you ask? It helps me know how wide the piece needs to be, how long, where the eyes and nose are, and all the rest. It just makes a huge difference in being able to make a final piece that matches the face. When doing a mask that actually follows the contours of the face, this is absolutely essential. Don't skip the plaster mold!

Another view. You can see the primary tool I'm using for shaping and smoothing there, too.

My first pass. Messy, bulky, just generally ick. I also didn't see the piece properly in my head when I started so I kinda took some wrong turns at first.

The eye piece smoothed out and thinned but now I have a mountain for the curved piece under the eyes instead of a valley. Thanks to my wife, I got this fixed in later versions.

Still very rough, put some cheek pieces on it. Still way ugly, I think.

Here we go. My wife set me straight finally. That curved bit should be dug into the clay, not built up. You can also see that there's a clay remnant ring up at the top. That's because I pulled the whole thing off the board, set the mask down, made some marks for the eyes on the board and then built it back up. It didn't take much since I already knew what I wanted to do. I'm really glad I did it, though. I was a little canted and had no real good idea of where the eyes and nose were.

Still looking messy. Things aren't square, lines aren't straight. I'm so glad I kept working at it as long as I did.

Getting pretty close now. The visor is looking pretty okay and the cheek piece is definitely improved.

View from the bottom. This mask basically drops straight down from the visor to the chin. We'll have to do a lot of padding in there to make it sit right, but it'll look neat, I think.

Another angle. You can see that the curves are smoother, the corners are sharper and everything is just generally cleaner. We're almost ready for molding now!

Sometimes taking a picture of it helps me see imperfections. See how the shape of the curvy bit isn't consistent on the right side? That's gotta get fixed.

Maybe a bit better, but still not there.

Much better. Not perfect, but as good as I have the skill to get it. Time for molding!

Here's a mask someone else made. I saw this picture and it helped so much with my process. I was trying to match it pretty well as it's easily the best Revan mask I was able to find online.

Mask in a box. This cardboard box is all taped up to keep plaster in. Note that the surface the the mask is not shiny at all. Why is that? Because I'm always really impatient at molding time and forgot to brush Vaseline onto the darned thing before building the box. So I had to go in with a brush and do it after the box was built. Lame. I also didn't do the heat gun smoothing trick. I should have but I figure I can sand fiberglass pretty easily if I need to.

And another shot of the mask in a box. The plaster is poured and set as of this writing. I'll be demolding tonight and hopefully laying fiberglass in a day or two once it's had a chance to dry out some more.

Thanks for reading!
Super awesome! I was sitting next to you as you did it, but looking at it in stages seems more impressive somehow.
ReplyDelete