So, if you've been wondering where I've been and what I've been doing, fear not. I'm still doing things, I've just been a bit of a slacker in posting about them.
Here, for your enjoyment, is a diagram of a Flemish string jig, used for making bowstrings. (Click for a bigger picture)

Constructing this jig requires a 30" piece of 2x4 and a bunch of finishing nails. Measuring and marking implements would also be helpful. Really, you just measure and mark out all the dots from the diagram onto your 2x4 and then hammer nails into each dot. It's incredibly easy and the jig is extremely versatile. You can use it to make strings of many different lengths and strengths, based on which pins you use and how many wraps you do.
Making a bowstring with this jig is really easy. You just take some bowstring material (Available Here) and tie it to the top "A" pin on the right side of the jig. Then you wrap it clockwise around to the bottom left pin, then up and around the center pin for the appropriate length for your bow (Length of the bow measured nock-to-nock). Continue back to the left and around the top left pin, then back up and around the "B" set of pins. Continue doing this until you've gone around all sets on the right, then Simply cut the strings right down the middle between the top and bottom pins on the right side of the jig. This will give your string a tapered effect which will help to keep it from being too bulky when you make your loops.
I'll go into how to make the strings in another entry. I may even include some pictures! I'm such a slacker when it comes to taking pictures while I'm making anything.
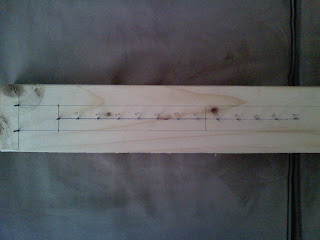
If you're interested, here are some pictures of the jig I made. As you can see, it's very simple. It's really just a tool used to make other things, so it doesn't have to be fancy. Total cost for this bad boy was...nothing for me, since I have rulers, pencils, nails and lumber laying around my house. Even if you didn't, if you had to spend more than $5 for this thing, you're doing it wrong.

You'll notice I cut the heads off my nails on the left but not the right. Really, you don't need to cut the heads off if you don't want to. They don't really do you any good, but they don't hurt anything either. If I had it to do over, i'd use finishing nails without heads and call it good.


Many, many thanks to Sam for his articles and build-alongs that have inspired and instructed me in all my bow-making efforts. His blog is here: Sam's Blog
No comments:
Post a Comment