This is my walking stick. So far, all I've done is to get it from a square piece of stock to a round piece of stock with some very minor tapering. I'm going to fix up the tapering and maybe shorten it a little. Right now it's over 4' long, which is a bit much for a walking stick, even for a man of my stature. You'll notice the copper pieces at the top and bottom, hopefully. Those will be staying the same, though I'm thinking about getting a different one for the top. Something with a stop in it would be helpful, I think. We'll see what I do. The ball on top is actually a 3" sphere (used for contact juggling) so it's bigger than the finished sphere will be. The finished sphere will also be clear and lit from the bottom.

This is what I've managed to do with my finger jig. You'll notice that the pins get shorter and shorter on both pieces as they go. I'm going to fix that up with a little bit of a tweak to the jig. Still, I'm amazed at how much easier these were to make than the ones using my router. the fingers are much thinner, but also much more uniform and much much faster to cut. I actually prefer the very thin fingers, especially on a piece this small.

Here's a picture of the fingers fitting together. They did so pretty darned well, really. The joints are very snug, which is exactly what you want in the situation. With a little glue in there, I think they'll be very strong and look quite good.

Here's the same joint at an angle.

Same joint at a different angle. You can see how these joints are very versatile and could be used to make joints of almost any angle. I'm wondering about the possibility of making a hexagonal or octagonal box using these joints. We'll see how far I get.

Last picture of this joint. This is just a test scrap, but I'm extremely pleased with the results. It was so fast and easy to do this piece, I think I may be able to start making boxes like this more often.

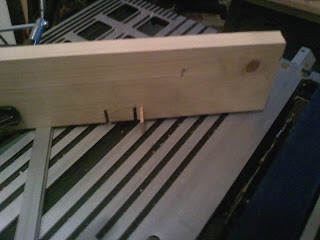
Here's my jig. pay no attention to the slot on the left. it was an error due to the saw blade being very very slightly off square. The slot and pin on the right are the way this jig works. The slot is where the saw blade (lower right) goes. It's almost exactly 1/8" wide, as is the pin. To start, you take the wood and butt it up against the pin, then clamp it and run it through the saw. Then take the gap you just made in the work piece and drop it onto the pin. Run the piece through the saw again. See? You're making perfectly spaced pins and slots that will fit into each other quite nicely.

Another angle on the jig. You can see the c-clamp and miter gauge better in this one.
So there you have it. I'll try to keep you all informed of my progress as I make it.
No comments:
Post a Comment